
Integrate MillionVerifier and Clay
Connecting MillionVerifier with Clay can improve your email validation and enrichment strategy. Today, I’ll walk you through the step-by-step process of integrating these two powerful tools, ensuring you get the most out of your cold email marketing efforts. Let’s dive right in!
Step 1: Understanding MillionVerifier
First off, why choose MillionVerifier? It’s widely regarded as the best email validation tool available. I recently conducted a test with 50,000 emails, comparing MillionVerifier with other popular tools like Debounce, NeverBounce, and ZeroBounce. The results were clear—MillionVerifier outshone the competition significantly. Trust me; you want to start with this tool.
Step 2: Sign Up for MillionVerifier
If you haven’t signed up for MillionVerifier yet, do it now! Purchase some credits and head over to the API tab. You’ll need to click on “Get an API Key.” If you’ve already got one, great! If not, this is your first step to accessing the powerful features of MillionVerifier.
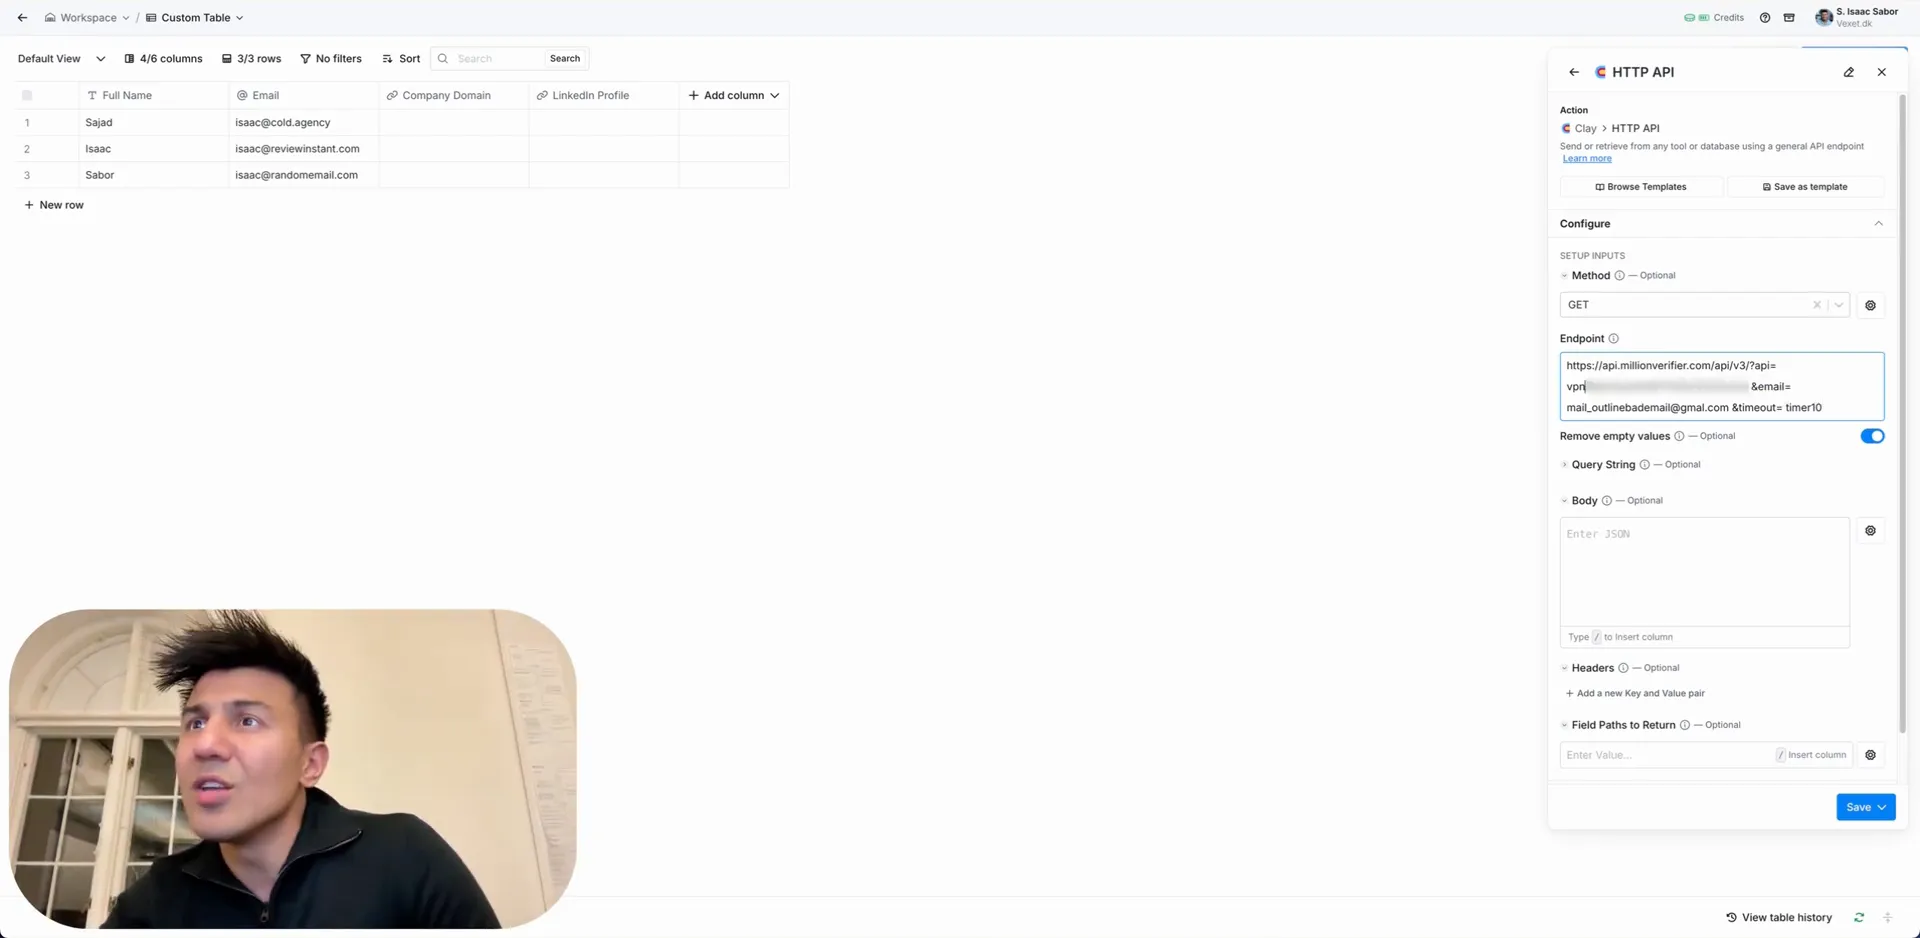
Step 3: Get Your API Key
Once you’re in the API section, you’ll find a real-life API example provided by MillionVerifier. This example will be our guide. The important part to note here is that there are three variables in the endpoint: your API key, the email you’ll validate, and a timeout setting (which you can keep at 10).
Step 4: Setting Up Clay
Next, we need to set up Clay. I made a quick table containing my name and several email addresses for this demonstration. For example:
- isaac@co.agency
- isaac@reviewincident.com
- isaac@randomemail.com
We’re hoping the first two will return valid results, while the last one should ideally show as invalid.
Step 5: Add a New Enrichment in Clay
In Clay, start by adding a new enrichment. You’ll want to select the HTTP API option. Here’s how to set it up:
- Set the method to GET since we’re retrieving data.
- Paste the endpoint you copied from MillionVerifier.
- Make sure to adjust the endpoint by removing any unnecessary spaces and variables.
- In the endpoint, replace the email variable with your actual email addresses.
Step 6: Save and Test
Once you’ve set everything up, save your progress and run the validation for ten rows. Let’s see how it works! Upon running the validation, you should see results showing the status of each email. Ideally, you’ll find:
- 200 OK for valid emails
- 400 or similar for invalid emails
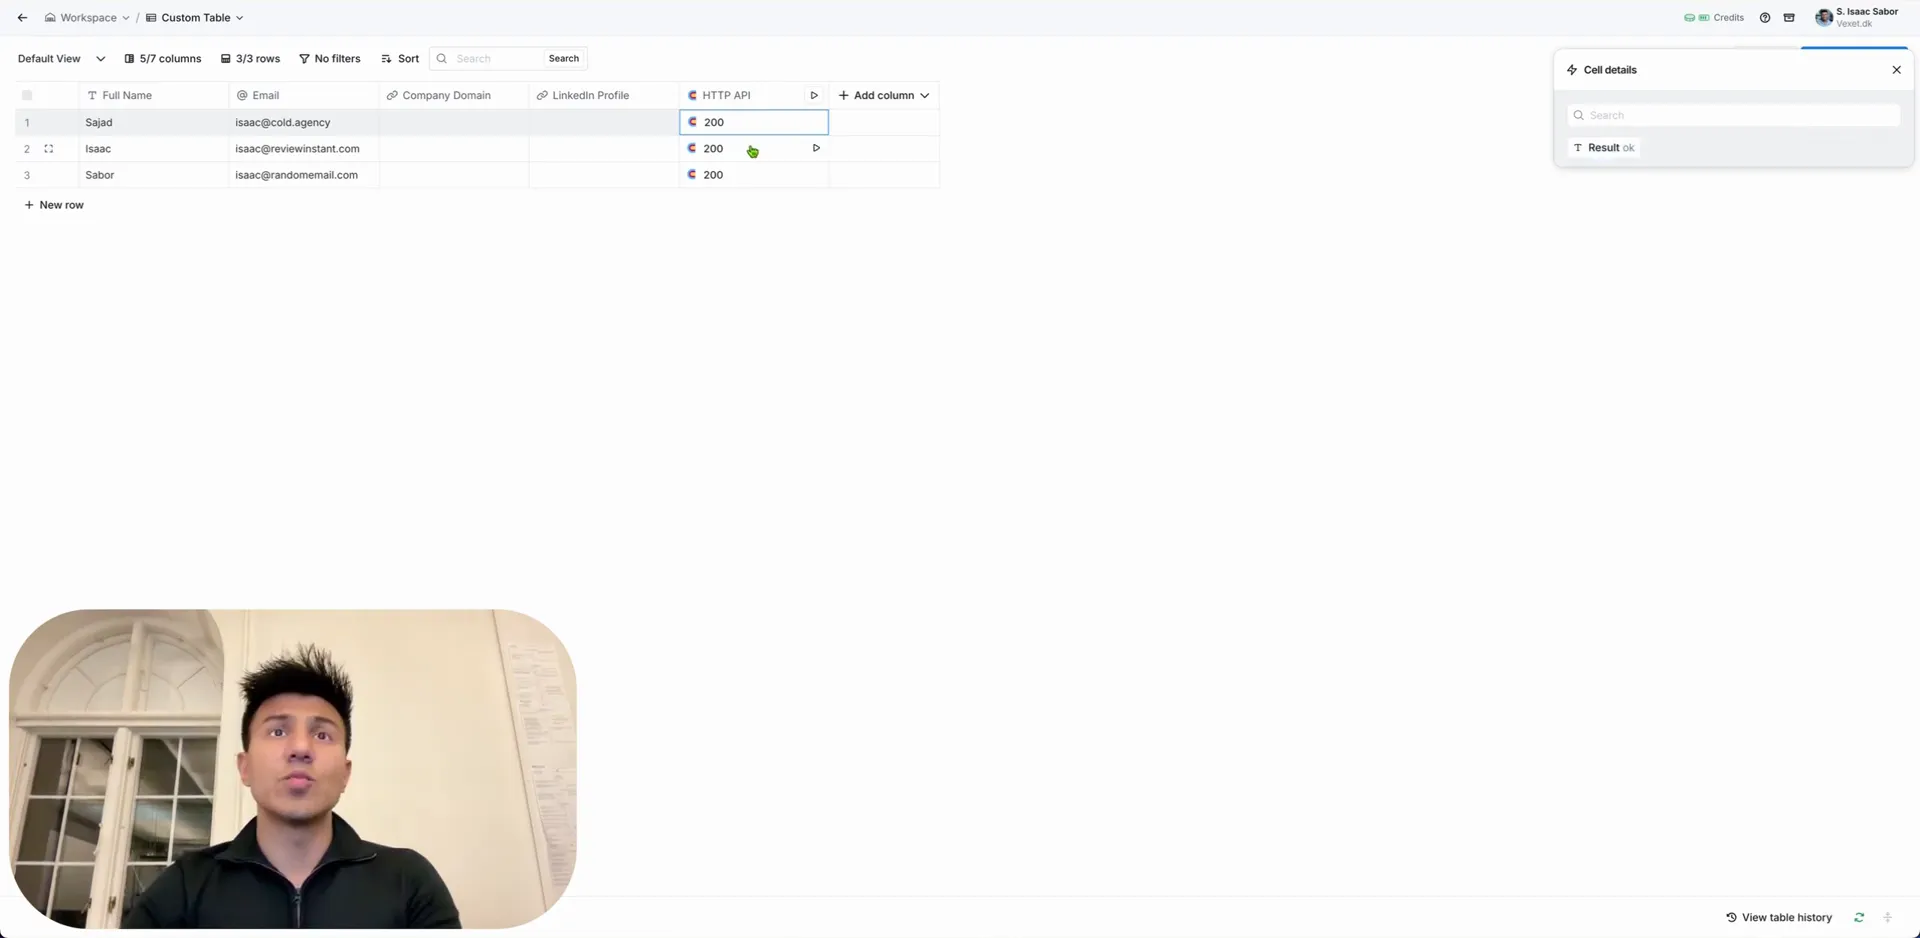
Step 7: Export Your Results
Now, to make use of the validated emails, you need to export the results into a new column in Clay. Just hover over the results area and add it as a column, naming it “Result.” This will allow you to easily filter and manage your verified emails.
Step 8: Scale Up Your Efforts
With your validated emails, you can now efficiently target your email marketing campaigns. This integration allows you to scale your efforts significantly. You can see the results directly in Clay and utilize them in your workflows. And that’s it! You’ve successfully integrated MillionVerifier with Clay without needing to rely on Zapier. This seamless connection can drastically enhance your email marketing strategy. For more insights and guides on similar integrations, check out our other resources. Hope you found this tutorial helpful! Now go ahead and make the most of your email marketing with MillionVerifier and Clay!
