
Seamlessly Integrate Instantly with Clay: A Step-by-Step Guide
In today’s digital landscape, managing cold email campaigns efficiently is important for success. The new integration between Clay and Instantly changes this process, making it easier than before to streamline outreach efforts. This guide will walk you through the setup and benefits of this powerful integration.
Table of Contents
- Setting Up Your Campaign ID
- Understanding Variables and Custom Fields
- Configuring Run Settings for Email Validation
- Finalizing Your Leads and Campaign
- Key Takeaways from the Integration
Why This Integration Matters
This integration addresses a common pain point for marketers and sales teams alike. It streamlines the workflow, reducing the time spent on technical setup. With the ability to add leads directly to your campaigns in Instantly from Clay, you can significantly enhance your outreach efforts.
Here are a few reasons why this integration is essential:
- Time-Saving: Automating the connection between Clay and Instantly means less manual intervention, allowing you to focus on strategy.
- Improved Accuracy: By connecting the two platforms, you minimize the risk of human error during data entry.
- Enhanced Lead Management: Easily manage and segment your leads, making your outreach more targeted and effective.
Must-haves for Using Clay and Instantly
Before diving into the integration process, ensure you have the following:
- Clay Account: You need a valid Clay account to access its features and functionalities.
- Instantly Hypergrowth Account: This account is necessary to utilize the campaign management tools offered by Instantly.
- API Key: You will need to generate an API key from your Instantly account to facilitate the connection.
Creating a New Campaign in Instantly
Once you have your accounts set up, the next step is to create a new campaign in Instantly. Here’s how:
- Log into your Instantly account.
- Navigate to the campaign section.
- Click on Add New Campaign.
- Enter a name for your campaign, such as Test Campaign One.
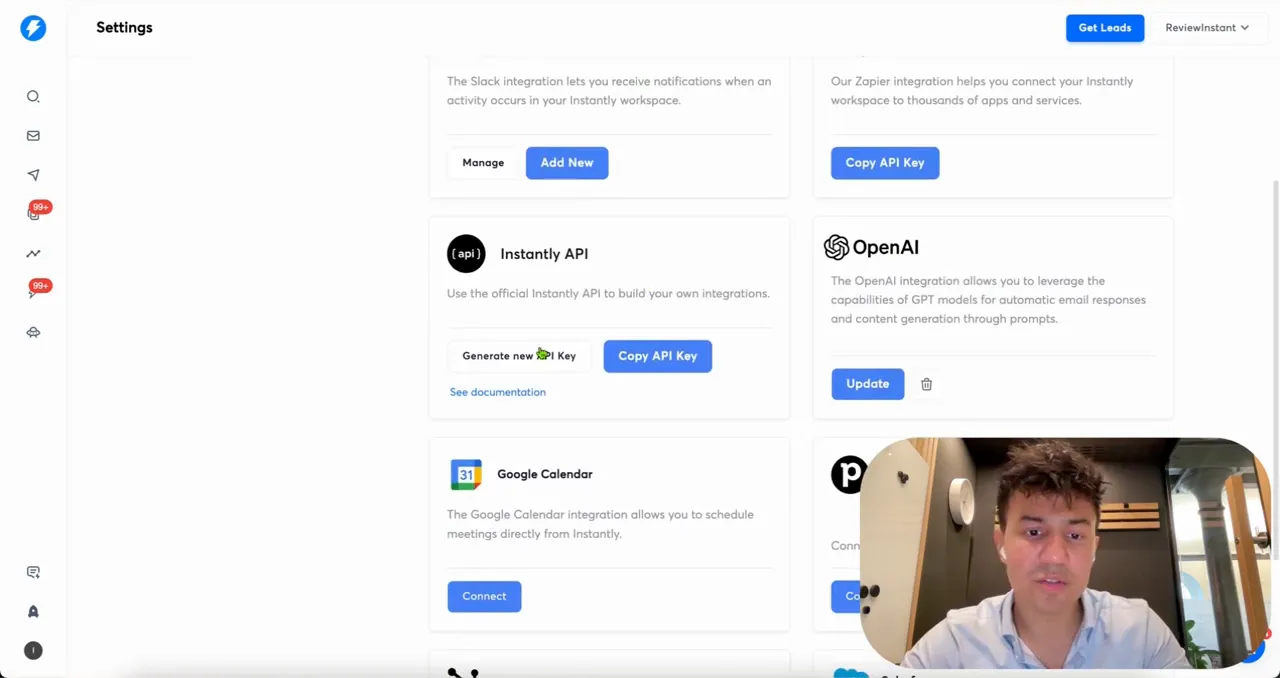
Generating Your API Key
To connect Clay with Instantly, you need to generate your API key. Follow these steps:
- Go to the Settings section in your Instantly account.
- Click on Integrations.
- Find the option to generate a new API key.
- Copy the API key and store it safely; generating a new key will replace your existing one.
Connecting Clay to Instantly
Now that you have your API key, it’s time to connect Clay to Instantly. Here’s how:
- Open your Clay account.
- Navigate to the connections tab.
- Click on Add New Account.
- Enter a memorable name for your connection.
- Paste your API key into the designated field.
- Test the connection; a green check mark will indicate a successful link.
This integration not only facilitates easier lead management but also enhances your overall campaign effectiveness. With the right setup, you can automate your outreach, ensuring you’re always reaching the right people at the right time.
Setting Up Your Campaign ID
Once you have created your campaign in Instantly, the next step is setting up your Campaign ID. This is a crucial part of the integration, as it allows Clay to recognize which campaign to add leads to.
To set your Campaign ID, follow these steps:
- In your Clay account, navigate to the settings for your integration.
- Locate the field for Campaign ID.
- Click on Refresh Fields to ensure the latest campaigns are loaded.
- Select your newly created campaign, which in this case is Test Campaign One.
Remember, the Campaign ID is essential for ensuring that your leads are directed to the correct campaign. If you skip this step, your leads may not be added where you expect them to be.
Understanding Variables and Custom Fields
Understanding how to utilize variables and custom fields is key to optimizing your outreach efforts. Variables allow you to personalize your emails, making them more engaging for your leads.
Here’s how to set up variables:
- In the Clay settings, look for the section labeled Variables.
- Begin by adding standard fields such as First Name, Last Name, and Email.
- For additional personalization, utilize custom fields. For example, you can add Company Name and Phone Number.
- To add a custom variable, enter a name (like URL) and paste the corresponding data.
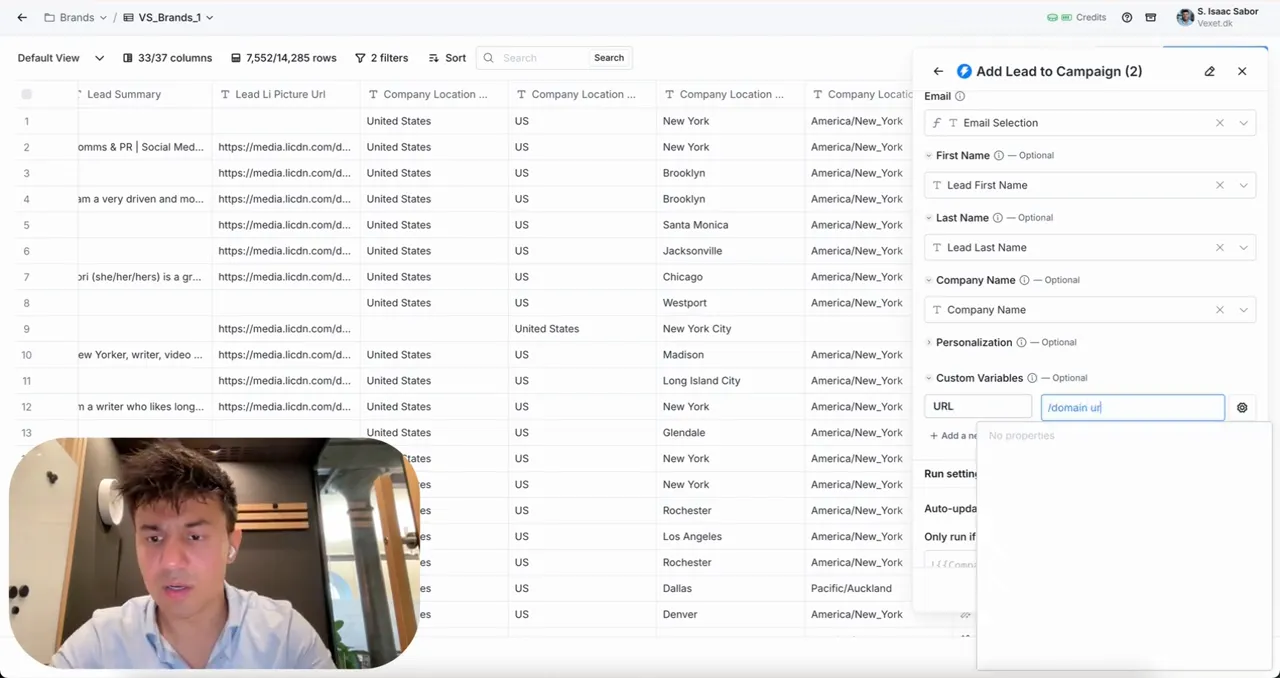
These variables not only improve the personalization of your emails but also improve the overall effectiveness of your campaigns. When leads feel that the communication is tailored to them, they are more likely to respond positively.
Configuring Run Settings for Email Validation
By validating your leads’ emails, you can avoid sending messages to invalid addresses, which can hurt your sender reputation.
To configure the run settings for email validation, follow these steps:
- In your Clay settings, find the section labeled Run Settings.
- Set the condition to Only run this column if the email is validated.
- Choose your email validation tool, such as Zero Bounce or Debounce.
- Make sure to filter for only valid emails to streamline your outreach.
This step is vital as it saves you time and resources by ensuring that only valid leads are targeted. By focusing your efforts on engaged leads, you increase the chances of successful outreach.
Finalizing Your Leads and Campaign
After configuring your variables and run settings, it’s time to finalize your leads and campaign. This step is about ensuring everything is in place before you start your outreach.
To finalize your campaign, do the following:
- Review all the entered variables and custom fields for accuracy.
- Confirm that your Campaign ID is correctly set up.
- Check that your email validation settings are properly configured.
- Once everything looks good, you can start adding your leads to the campaign.
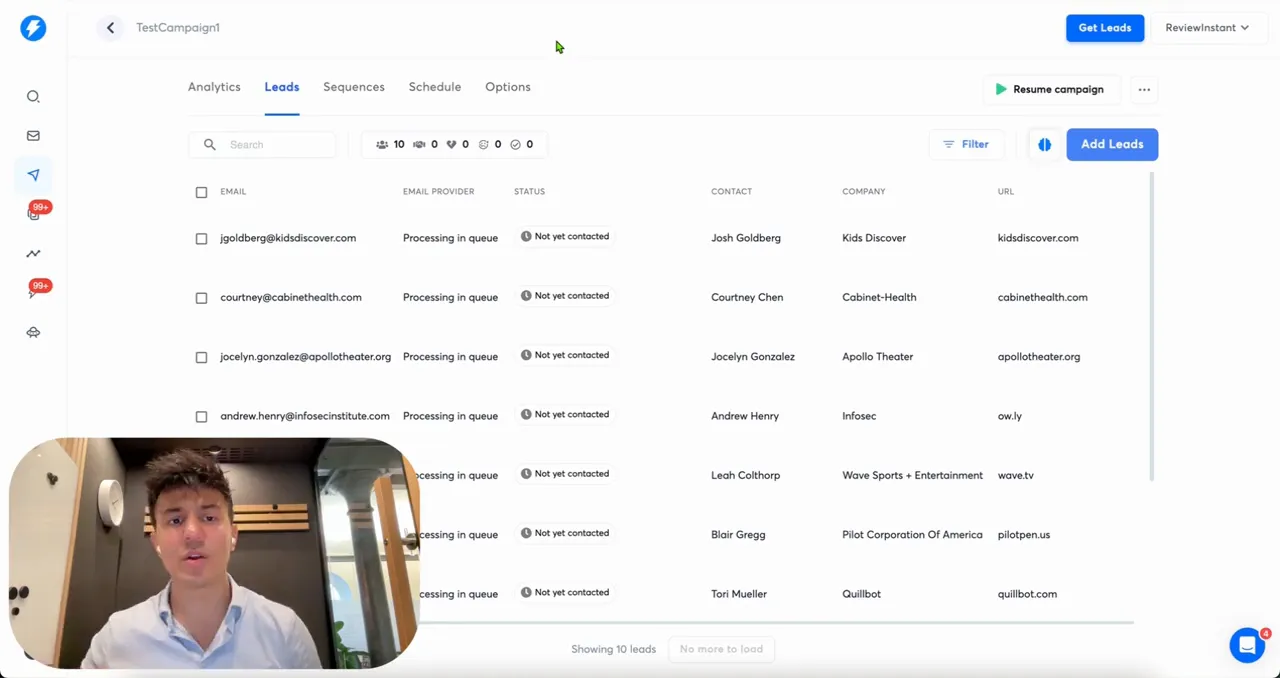
Finalizing your leads ensures that you are ready to launch your outreach efforts with confidence. Taking the time to double-check your settings can make a significant difference in the success of your campaigns.
Key Takeaways from the Integration
This integration between Clay and Instantly simplifies the cold emailing process significantly. Here are some key takeaways:
- Streamlined Process: The integration allows for a seamless flow of leads from Clay to Instantly, saving time and effort.
- Increased Accuracy: By using variables and custom fields, you can ensure your emails are personalized and relevant.
- Email Validation: Filtering for valid emails reduces the risk of damaging your sender reputation.
- Efficiency: All settings and configurations can be handled within the same platform, making it easier to manage your campaigns.
By following these steps and utilizing the tools available, you can enhance your outreach strategy and achieve better results from your email campaigns. For more insights into optimizing your outreach efforts, check out our guides on cold emailing strategies.
